IPFS Upload API — Eksiksiz Geliştirici Eğitimi
REST API aracılığıyla IPFS'e dosya yüklemeyi öğrenin. JavaScript, Node.js ve curl için tam kod örnekleri. JSON, görüntü yükleyin, istemci tarafı yüklemeler için imzalı tokenler kullanın.
Nacho founded IPFS.NINJA to make content-addressed storage feel as simple as an S3 PUT — a single API call, a permanent CID, no wallets or peer discovery to reason about.

IPFS’e dosya yüklemek, bir POST isteği göndermek kadar basit olmalıdır. Bu eğitimde tam olarak bunu yapacaksınız — sadece fetch() ve bir API anahtarı ile JSON belgeleri, görüntüler ve PDF’leri IPFS’e yükleyin. Sonunda, içerik yükleyen, dosyaları listeleyen, meta verileri alan ve güvenli istemci tarafı yüklemeleri için imzalı tokenler oluşturan tam bir Node.js script’iniz olacak. IPFS’te yeni misiniz? Koda dalmadan önce temelleri anlamak için IPFS Pinning Nedir? ile başlayın.
Ne İnşa Edeceksiniz#
- Bir JSON nesnesini IPFS’e yükleyin ve bir içerik tanımlayıcı (CID) geri alın.
- Diskten bir binary görüntü yükleyin.
- Yüklemelere açıklamalar ve özel meta veriler ekleyin.
- Yükleme geçmişinizi tarih aralığına göre sorgulayın.
- Belirli bir dosya için ayrıntıları alın.
- API anahtarınızı açığa çıkarmadan bir tarayıcının doğrudan yükleme yapabilmesi için süre sınırlı imzalı tokenler oluşturun.
- Hataları işleyin ve yeniden deneme mantığını uygulayın.
Her şey tek bir temel URL’ye karşı çalışır: https://api.ipfs.ninja
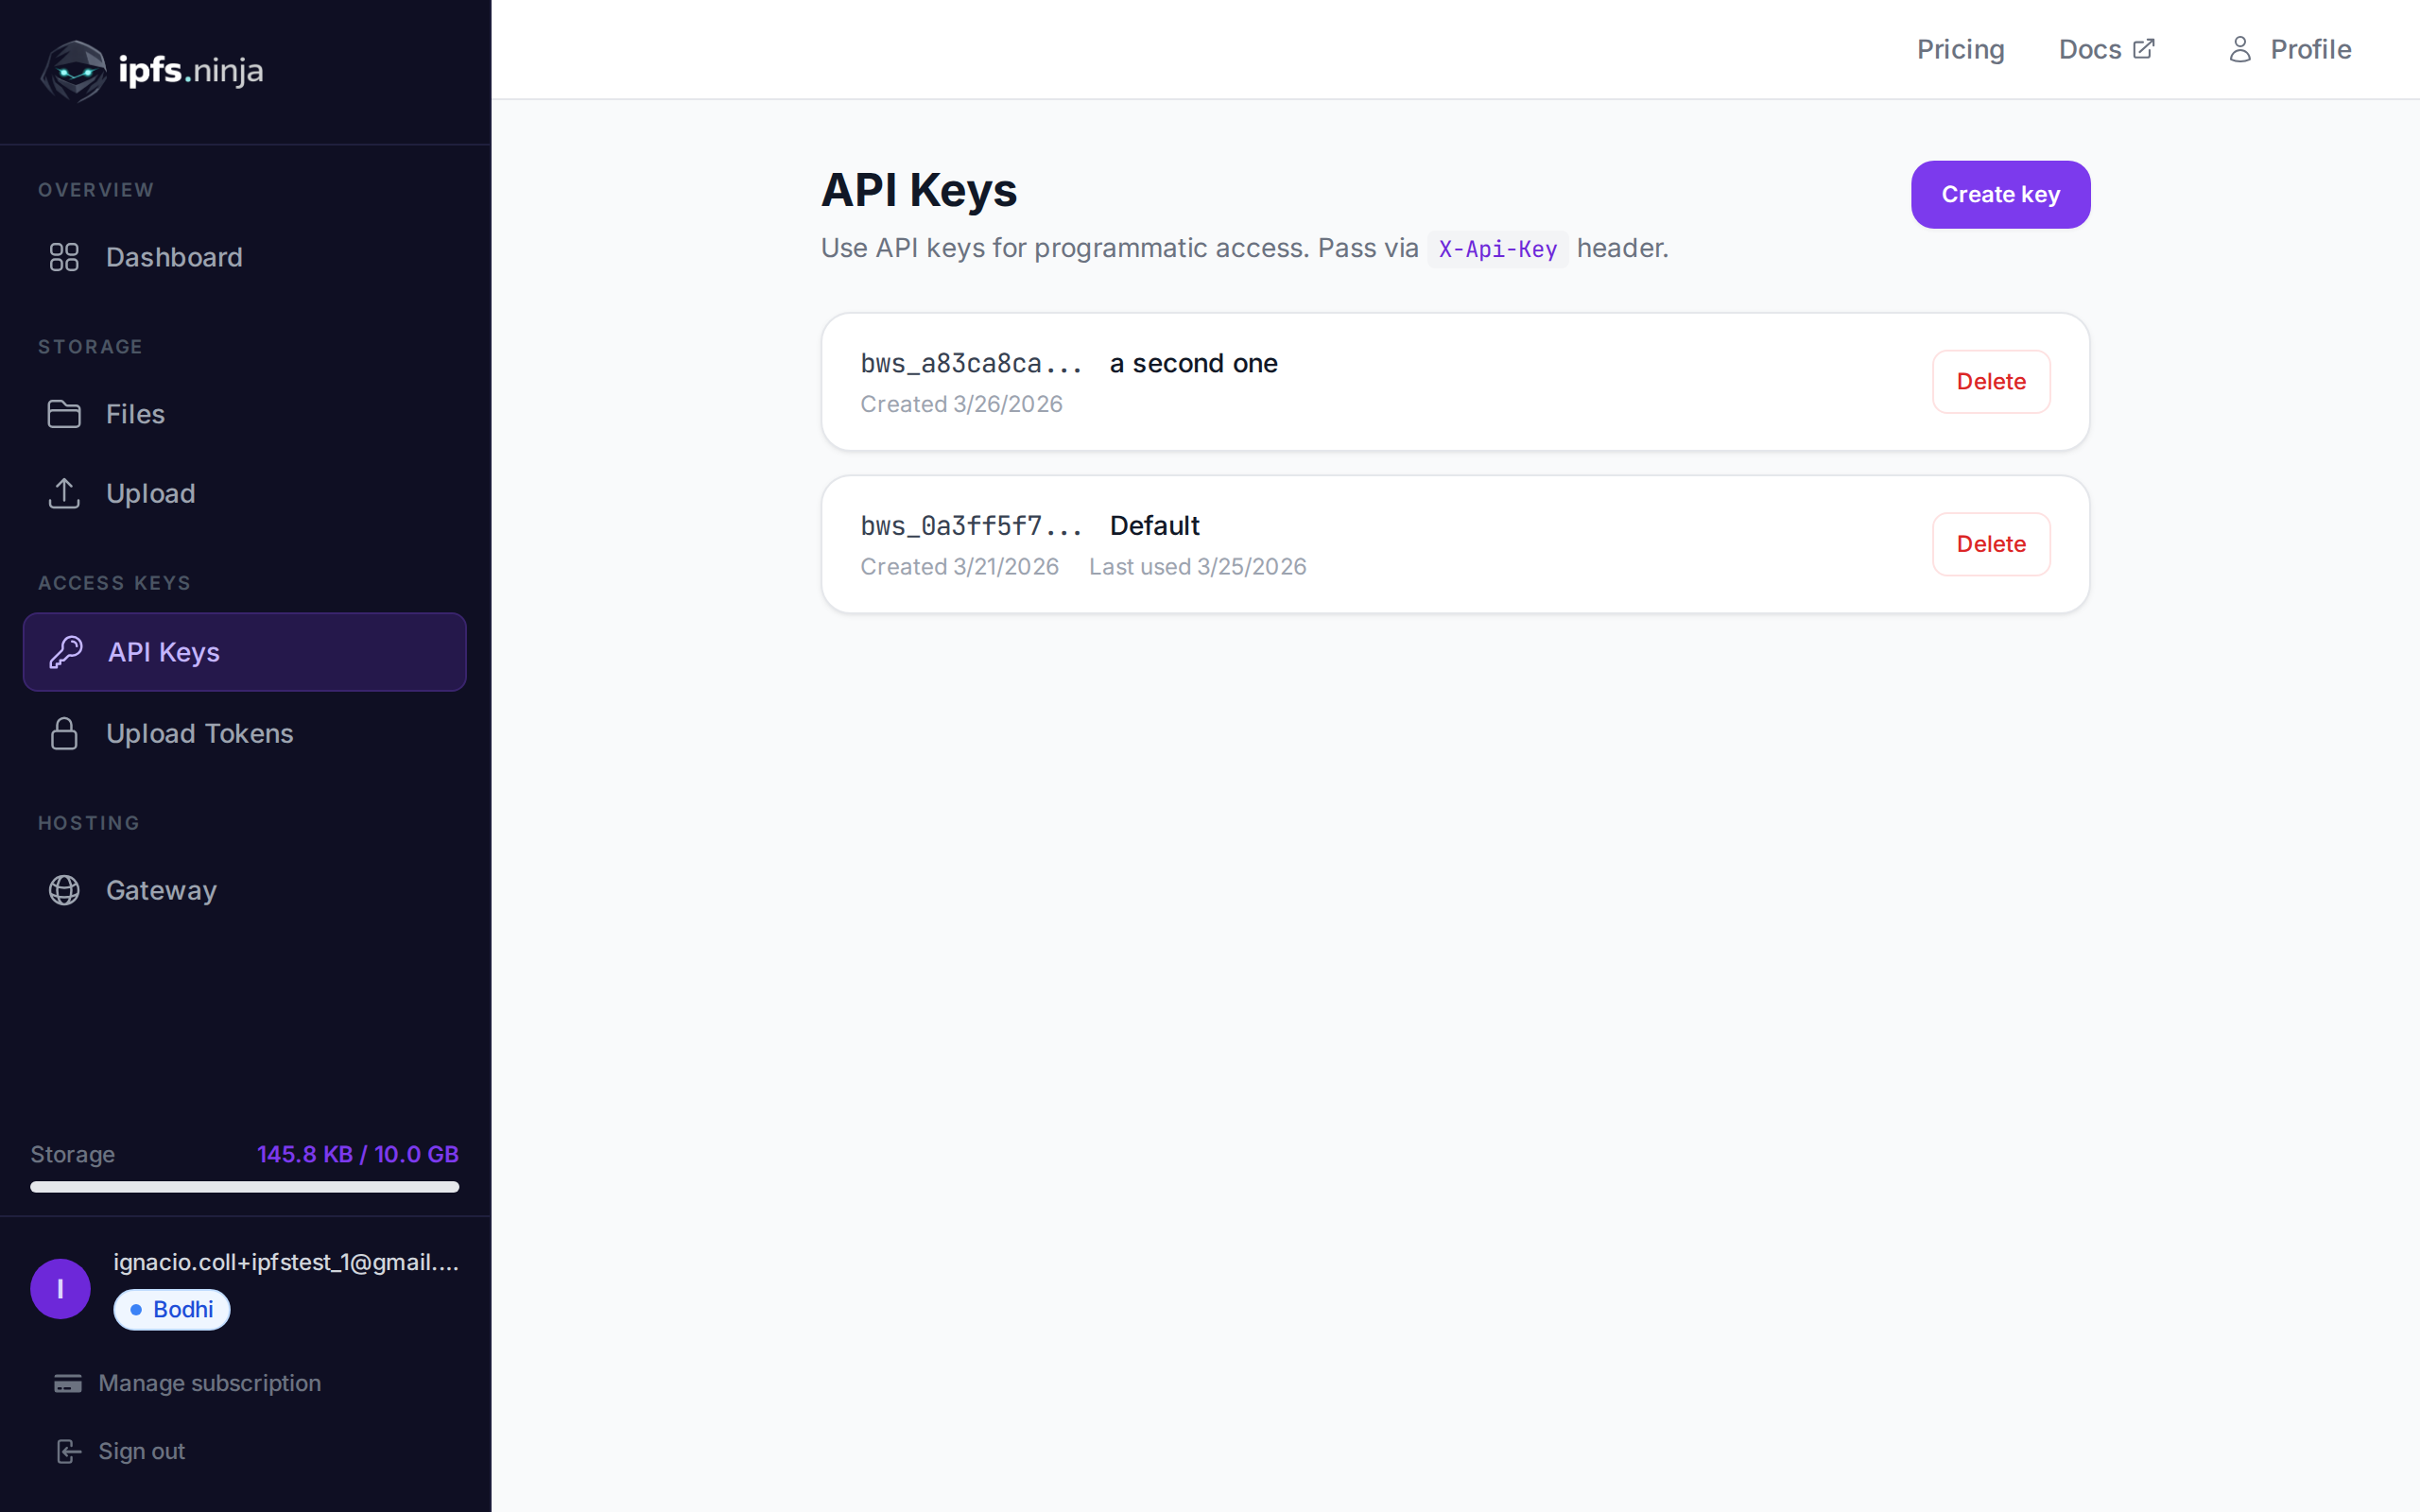
1. Kurulum — Kayıt Olun ve API Anahtarı Alın#
- Ücretsiz bir hesap için kayıt olun (kredi kartı gerekmez).
- Dashboard kenar çubuğunda API Keys’e gidin.
- Create key’e tıklayın, bir ad verin ve anahtarı hemen kopyalayın — tekrar gösterilmeyecektir.
Anahtarınız bws_a1b2c3d4e5f6a7b8c9d0e1f2a3b4c5d6 gibi görünür. Aşağıdaki her örnek, onu X-Api-Key başlığında gönderir.
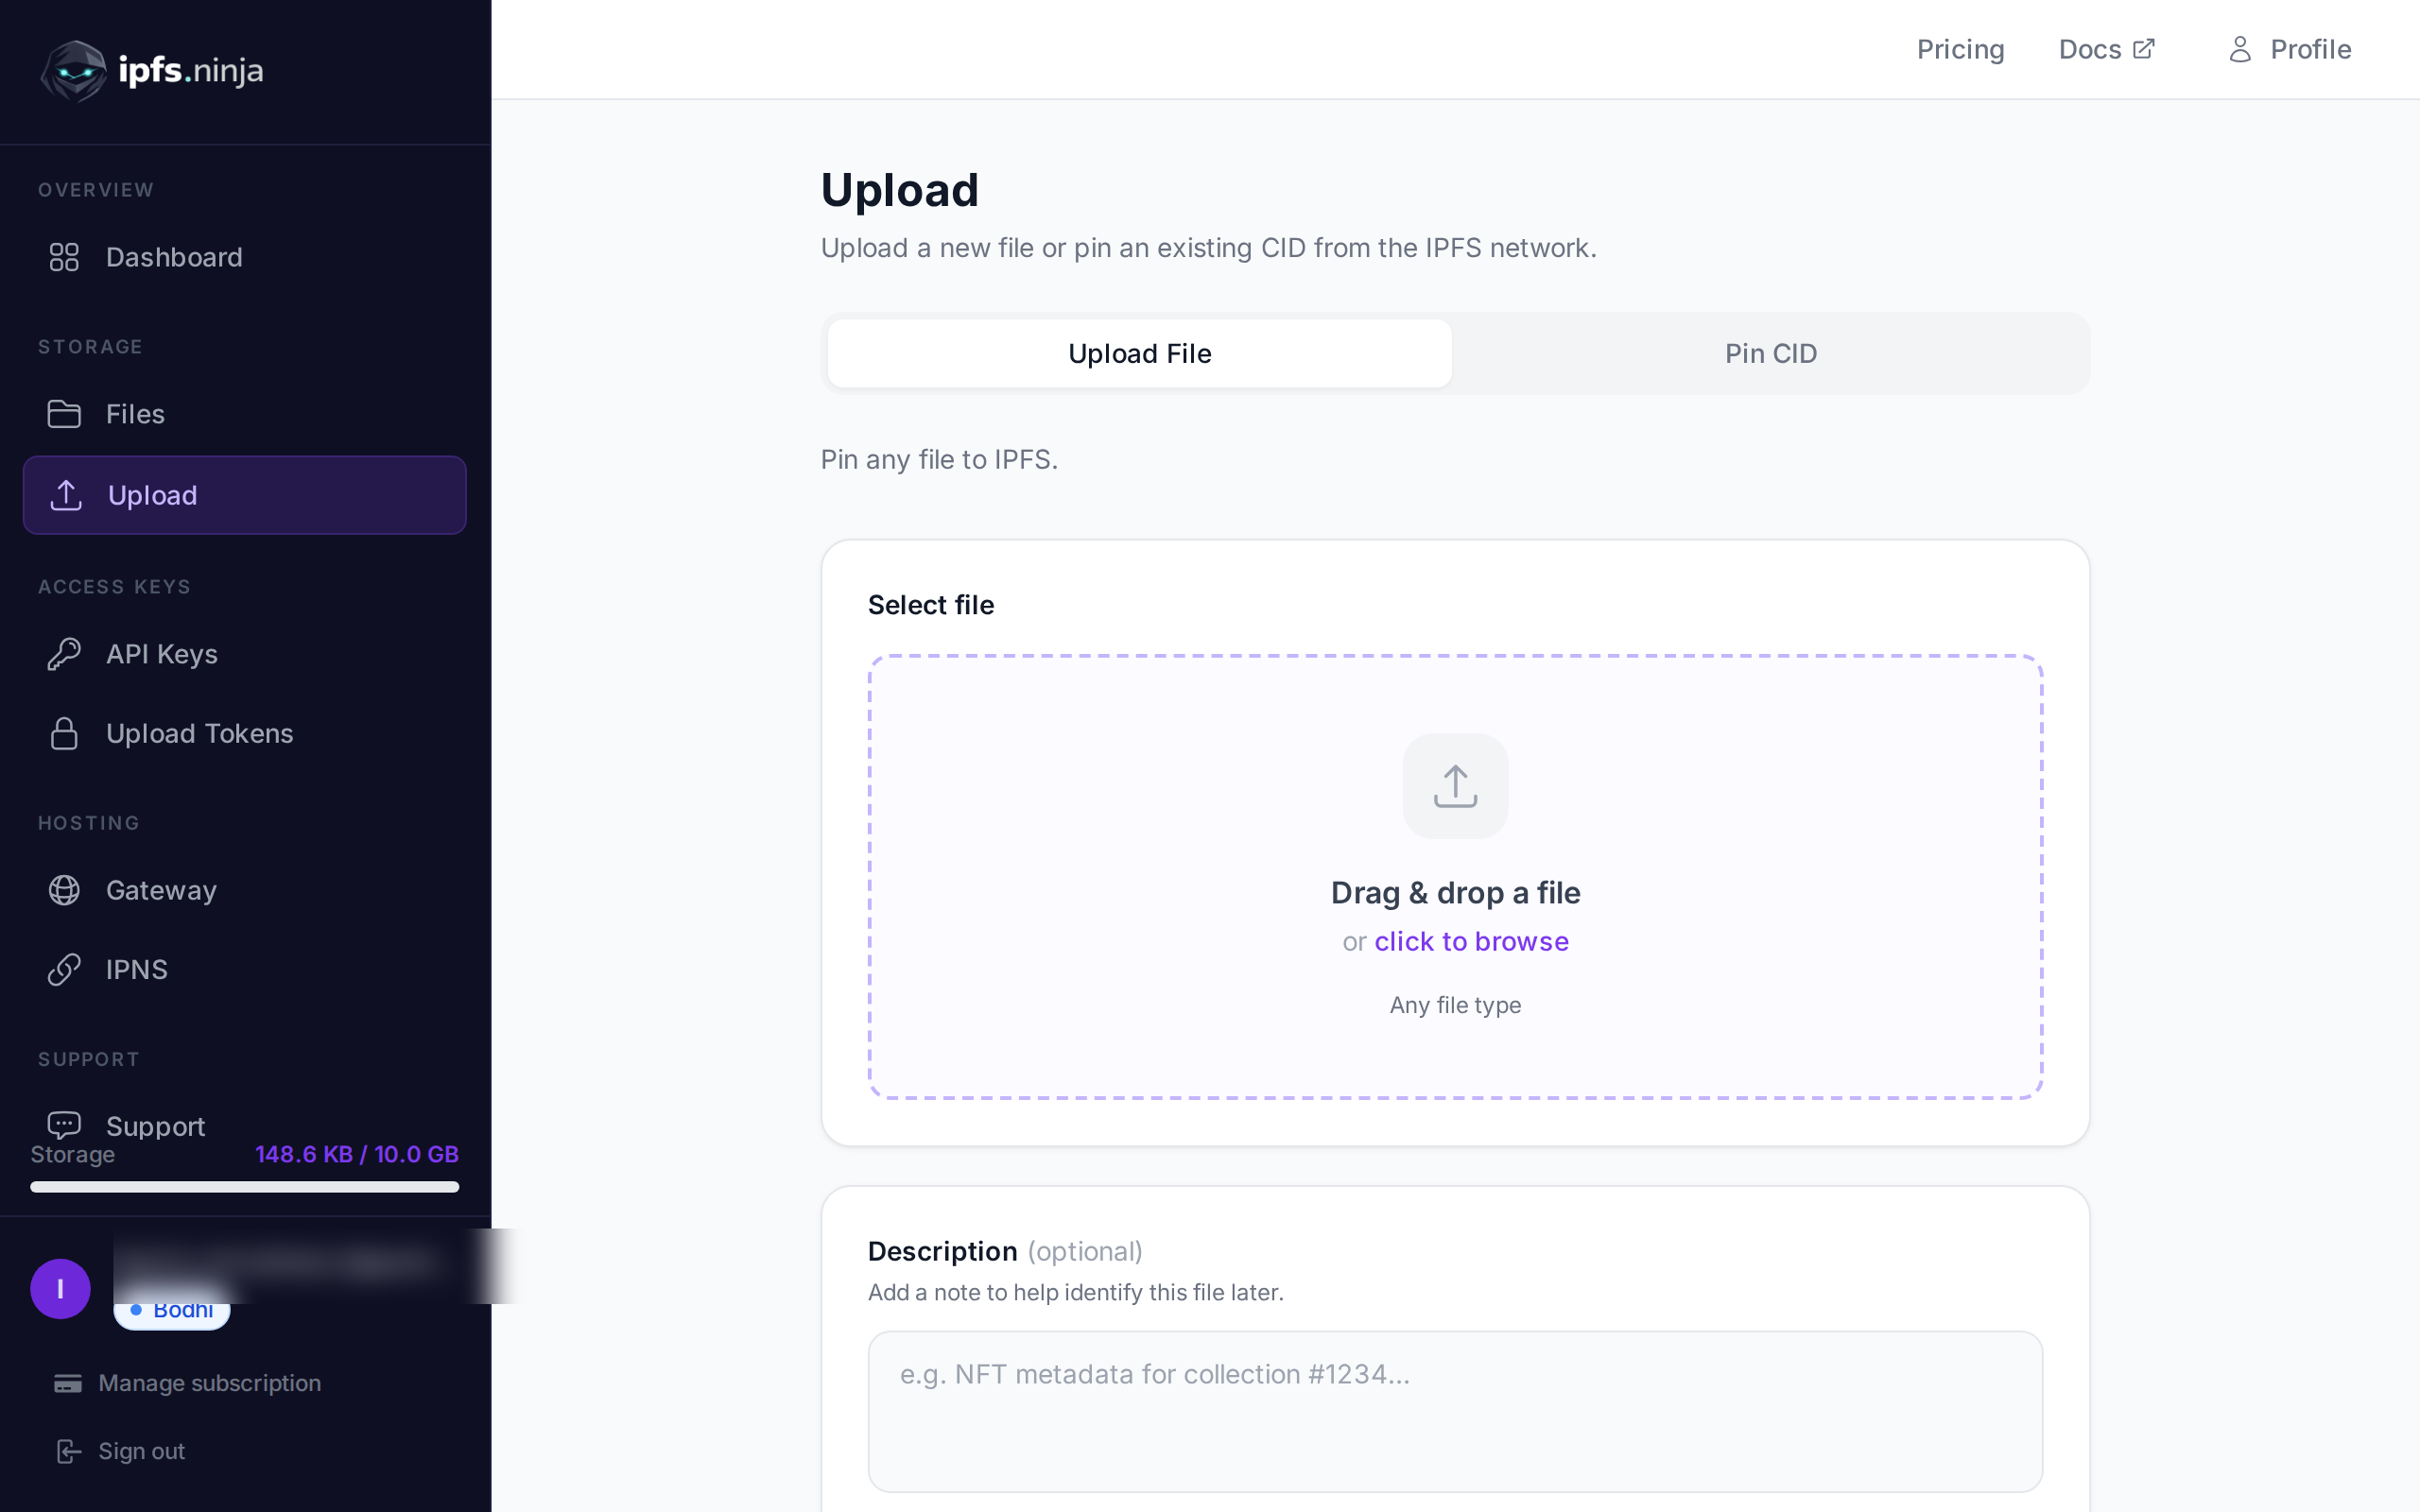
2. IPFS’e JSON Yükle#
En basit yükleme: düz bir JavaScript nesnesini content olarak geçirin ve API onu serileştirir, IPFS’e pin’ler ve CID döndürür.
// upload-json.mjs
const API = "https://api.ipfs.ninja";
const API_KEY = "bws_your_key_here";

const payload = {
  content: {
    name: "Galactic Badge #42",
    description: "Proof of attendance — Galactic Meetup 2026",
    attributes: [
      { trait_type: "Event", value: "Galactic Meetup" },
      { trait_type: "Year", value: 2026 }
    ]
  }
};

const res = await fetch(`${API}/upload/new`, {
  method: "POST",
  headers: {
    "Content-Type": "application/json",
    "X-Api-Key": API_KEY
  },
  body: JSON.stringify(payload)
});

const data = await res.json();
console.log("CID :", data.cid);
console.log("Size:", data.sizeMB, "MB");
console.log("IPFS:", data.uris.ipfs);
console.log("URL :", data.uris.url);
node upload-json.mjs ile çalıştırın. Başarılı bir yanıt şöyle görünür:
{
  "cid": "bafkreigx7gq...",
  "sizeMB": 0.0004,
  "uris": {
    "ipfs": "ipfs://bafkreigx7gq...",
    "url": "https://ipfs.ninja/ipfs/bafkreigx7gq..."
  }
}
url alanı bir genel HTTP ağ geçidine işaret eder, böylece içerik herhangi bir tarayıcıda hemen erişilebilir.
3. Bir Görüntü Yükle#
Binary dosyalar (görüntüler, PDF’ler, ses) content alanında base64 ile kodlanmış stringler olarak gönderilir.
// upload-image.mjs
import { readFileSync } from "node:fs";

const API = "https://api.ipfs.ninja";
const API_KEY = "bws_your_key_here";

const imageBuffer = readFileSync("./photo.png");
const base64 = imageBuffer.toString("base64");

const res = await fetch(`${API}/upload/new`, {
  method: "POST",
  headers: {
    "Content-Type": "application/json",
    "X-Api-Key": API_KEY
  },
  body: JSON.stringify({ content: base64 })
});

const data = await res.json();
console.log("Image CID:", data.cid);
console.log("Gateway  :", data.uris.url);
API, MIME türünü otomatik olarak algılar — PNG, JPEG, WebP, GIF ve PDF’in tümü desteklenir. Ek başlık veya content-type geçersiz kılma gerekmez.
curl ile aynı işlem şöyle görünür:
BASE64=$(base64 -w 0 photo.png)

curl -X POST https://api.ipfs.ninja/upload/new \
  -H "Content-Type: application/json" \
  -H "X-Api-Key: bws_your_key_here" \
  -d "{\"content\": \"$BASE64\"}"
4. Meta Verilerle Yükleme#
Her yükleme iki isteğe bağlı alanı kabul eder: description (serbest metin etiketi) ve metadata (rastgele anahtar-değer çiftleri). Her ikisi de CID ile birlikte saklanır ve dosyayı daha sonra listelediğinizde veya aldığınızda döndürülür.
// upload-with-metadata.mjs
const API = "https://api.ipfs.ninja";
const API_KEY = "bws_your_key_here";

const res = await fetch(`${API}/upload/new`, {
  method: "POST",
  headers: {
    "Content-Type": "application/json",
    "X-Api-Key": API_KEY
  },
  body: JSON.stringify({
    content: { title: "Meeting Notes", body: "Q1 roadmap recap..." },
    description: "Q1 2026 planning meeting notes",
    metadata: {
      project: "acme-app",
      author: "dana",
      version: "1"
    }
  })
});

const data = await res.json();
console.log("CID:", data.cid);
Meta veriler, IPFS içeriğini ayrıştırmadan kendi tarafınızda dosyaları filtrelemeyi ve düzenlemeyi kolaylaştırır.
5. Mevcut Bir CID’yi Sabitle#
IPFS’te zaten içeriğiniz varsa ve onun kullanılabilir kalmasını sağlamak istiyorsanız, onu CID ile sabitleyin:
// pin-cid.mjs
const API = "https://api.ipfs.ninja";
const API_KEY = "bws_your_key_here";

const res = await fetch(`${API}/pin`, {
  method: "POST",
  headers: {
    "Content-Type": "application/json",
    "X-Api-Key": API_KEY
  },
  body: JSON.stringify({
    cid: "bafkreigx7gq...",
    description: "Pinned from external source"
  })
});

const data = await res.json();
console.log("Pinned:", data.cid);
6. Dosyalarınızı Listele#
Bir zaman penceresinde yüklediğiniz her dosyayı alın. from ve to sorgu parametreleri milisaniye cinsinden Unix zaman damgalarıdır.
// list-files.mjs
const API = "https://api.ipfs.ninja";
const API_KEY = "bws_your_key_here";

const now = Date.now();
const oneWeekAgo = now - 7 * 24 * 60 * 60 * 1000;

const url = `${API}/upload/list?from=${oneWeekAgo}&to=${now}`;

const res = await fetch(url, {
  headers: { "X-Api-Key": API_KEY }
});

const files = await res.json();

for (const file of files) {
  console.log(`${file.cid}  ${file.description ?? "(no description)"}`);
}
curl ile:
FROM=$(($(date +%s) * 1000 - 604800000))
TO=$(($(date +%s) * 1000))

curl -s "https://api.ipfs.ninja/upload/list?from=$FROM&to=$TO" \
  -H "X-Api-Key: bws_your_key_here" | jq .
7. Dosya Ayrıntılarını Al#
Meta veriler, boyut ve zaman damgaları dahil olmak üzere tek bir CID için tam kaydı getirin:
// get-file.mjs
const API = "https://api.ipfs.ninja";
const API_KEY = "bws_your_key_here";
const CID = "bafkreigx7gq...";

const res = await fetch(`${API}/file/${CID}`, {
  headers: { "X-Api-Key": API_KEY }
});

const details = await res.json();
console.log(JSON.stringify(details, null, 2));
8. İmzalı Tokenlerle İstemci Tarafı Yüklemeler#
Bir API anahtarını tarayıcı bundle’a yerleştirmek bir güvenlik riskidir. Bunun yerine, sunucunuzda kısa ömürlü bir imzalı token oluşturun ve istemciye iletin.
Sunucu (Express)#
// server.mjs
import express from "express";

const app = express();
const API = "https://api.ipfs.ninja";
const API_KEY = process.env.IPFS_API_KEY;

app.post("/api/upload-token", async (req, res) => {
  const response = await fetch(`${API}/upload/signed-url`, {
    method: "POST",
    headers: {
      "Content-Type": "application/json",
      "X-Api-Key": API_KEY
    },
    body: JSON.stringify({
      name: "browser-upload",
      expiresIn: 600          // token valid for 10 minutes
    })
  });

  const { token, tokenId, expiresAt } = await response.json();
  res.json({ token, tokenId, expiresAt });
});

app.listen(3000, () => console.log("Server running on :3000"));
Tarayıcı İstemcisi#
<!-- upload.html -->
<input type="file" id="filePicker" />
<button id="uploadBtn">Upload to IPFS</button>
<pre id="result"></pre>

<script>
  const API = "https://api.ipfs.ninja";

  document.getElementById("uploadBtn").addEventListener("click", async () => {
    // 1. Get a signed token from your own backend
    const tokenRes = await fetch("/api/upload-token", { method: "POST" });
    const { token } = await tokenRes.json();

    // 2. Read the selected file as base64
    const file = document.getElementById("filePicker").files[0];
    if (!file) return alert("Pick a file first");

    const base64 = await new Promise((resolve) => {
      const reader = new FileReader();
      reader.onload = () => resolve(reader.result.split(",")[1]);
      reader.readAsDataURL(file);
    });

    // 3. Upload directly to IPFS using the signed token
    const uploadRes = await fetch(`${API}/upload/new`, {
      method: "POST",
      headers: {
        "Content-Type": "application/json",
        "Authorization": `Signed ${token}`
      },
      body: JSON.stringify({
        content: base64,
        description: file.name
      })
    });

    const data = await uploadRes.json();
    document.getElementById("result").textContent = JSON.stringify(data, null, 2);
  });
</script>
Tarayıcı API anahtarınızı asla görmez. İmzalı token otomatik olarak süresi dolar. Tokenler çoklu kullanımdır — süresi dolana veya iptal edilene kadar birden çok kez kullanılabilir. useCount izlenir, ancak bir sınır olarak uygulanmaz.
9. Hata İşleme#
API geleneksel HTTP durum kodlarını kullanır. İşte açıkça işlemeniz gereken kodlar:
| Status | Anlam | Ne yapmalı |
|---|---|---|
| 400 | Bad request — eksik veya geçersiz alanlar | content’ün mevcut ve geçerli olduğunu kontrol edin |
| 401 | Unauthorized — kötü veya eksik API anahtarı | X-Api-Key başlığını doğrulayın |
| 413 | Payload çok büyük | Dosya boyutunu azaltın veya içeriği bölün |
| 429 | Hız sınırı | Geri çekilin ve üstel gecikmeyle yeniden deneyin |
| 500 | Sunucu hatası | Kısa bir gecikmeden sonra yeniden deneyin |
Üstel backoff ile dayanıklı bir yükleme fonksiyonu:
// resilient-upload.mjs
const API = "https://api.ipfs.ninja";
const API_KEY = "bws_your_key_here";

async function uploadWithRetry(content, retries = 3) {
  for (let attempt = 1; attempt <= retries; attempt++) {
    const res = await fetch(`${API}/upload/new`, {
      method: "POST",
      headers: {
        "Content-Type": "application/json",
        "X-Api-Key": API_KEY
      },
      body: JSON.stringify({ content })
    });

    if (res.ok) return await res.json();

    const body = await res.text();

    if (res.status === 401) {
      throw new Error(`Authentication failed: ${body}`);
    }

    if (res.status === 413) {
      throw new Error(`Payload too large — reduce file size. ${body}`);
    }

    if (res.status === 429 || res.status >= 500) {
      const delay = Math.pow(2, attempt) * 1000;    // 2s, 4s, 8s
      console.warn(`Attempt ${attempt} failed (${res.status}). Retrying in ${delay}ms...`);
      await new Promise((r) => setTimeout(r, delay));
      continue;
    }

    throw new Error(`Upload failed (${res.status}): ${body}`);
  }

  throw new Error("Upload failed after all retries");
}

// Usage
const data = await uploadWithRetry({ hello: "world" });
console.log("CID:", data.cid);
10. Tam Çalışan Örnek#
Bu eğitimde ele alınan her endpoint’i kullanan tek bir script. ipfs-demo.mjs olarak kaydedin ve node ipfs-demo.mjs ile çalıştırın.
// ipfs-demo.mjs
import { readFileSync } from "node:fs";

const API = "https://api.ipfs.ninja";
const API_KEY = "bws_your_key_here";

const headers = {
  "Content-Type": "application/json",
  "X-Api-Key": API_KEY
};

async function request(method, path, body) {
  const opts = { method, headers };
  if (body) opts.body = JSON.stringify(body);
  const res = await fetch(`${API}${path}`, opts);
  if (!res.ok) throw new Error(`${method} ${path} → ${res.status}: ${await res.text()}`);
  return res.json();
}

// --- 1. Upload JSON ---
console.log("--- Upload JSON ---");
const jsonResult = await request("POST", "/upload/new", {
  content: { name: "Demo Token", edition: 1 },
  description: "Tutorial demo — JSON upload",
  metadata: { tutorial: "true" }
});
console.log("CID:", jsonResult.cid);
console.log("URL:", jsonResult.uris.url);

// --- 2. Upload an image (if photo.png exists) ---
try {
  const img = readFileSync("./photo.png");
  console.log("\n--- Upload Image ---");
  const imgResult = await request("POST", "/upload/new", {
    content: img.toString("base64"),
    description: "Tutorial demo — image upload"
  });
  console.log("CID:", imgResult.cid);
  console.log("URL:", imgResult.uris.url);
} catch {
  console.log("\n--- Skipping image upload (no photo.png found) ---");
}

// --- 3. Pin the JSON CID ---
console.log("\n--- Pin CID ---");
const pinResult = await request("POST", "/pin", {
  cid: jsonResult.cid,
  description: "Pinned from tutorial"
});
console.log("Pinned:", pinResult.cid);

// --- 4. Get file details ---
console.log("\n--- File Details ---");
const details = await request("GET", `/file/${jsonResult.cid}`);
console.log(JSON.stringify(details, null, 2));

// --- 5. List recent files ---
console.log("\n--- Recent Files ---");
const now = Date.now();
const oneHourAgo = now - 60 * 60 * 1000;
const files = await request("GET", `/upload/list?from=${oneHourAgo}&to=${now}`);
console.log(`Found ${files.length} file(s) in the last hour`);
for (const f of files) {
  console.log(` - ${f.cid}  ${f.description ?? ""}`);
}

// --- 6. Create a signed upload token ---
console.log("\n--- Signed Token ---");
const tokenResult = await request("POST", "/upload/signed-url", {
  name: "demo-token",
  expiresIn: 300
});
console.log("Token ID :", tokenResult.tokenId);
console.log("Expires  :", new Date(tokenResult.expiresAt).toISOString());

// --- 7. Upload using the signed token ---
console.log("\n--- Upload with Signed Token ---");
const signedRes = await fetch(`${API}/upload/new`, {
  method: "POST",
  headers: {
    "Content-Type": "application/json",
    "Authorization": `Signed ${tokenResult.token}`
  },
  body: JSON.stringify({
    content: { note: "Uploaded with a signed token" }
  })
});
const signedData = await signedRes.json();
console.log("CID:", signedData.cid);

console.log("\nDone.");bws_your_key_here’i gerçek bir anahtarla değiştirin ve script’i çalıştırın. Her adım sonucunu yazdırır, böylece takip edebilirsiniz.
11. Sonraki Adımlar#
Artık IPFS Upload API aracılığıyla dosyaları yükleme, sabitleme, listeleme ve alma ve imzalı tokenlerle tarayıcı yüklemelerini güvenli tutma yöntemlerini biliyorsunuz. Dashboard UI ve Python örnekleri dahil daha geniş bir genel bakış için, IPFS’e Dosya Nasıl Yüklenir adresine bakın. Buradan nereye gidileceği:
- API Referansı — Tam endpoint dokümantasyonu ipfs.ninja/docs adresinde.
- Özel Ağ Geçitleri — IPFS içeriğini kendi alan adınızdan sunun. Ağ geçidi kurulum kılavuzu’na bakın.
- Analitik — Dashboard’da yükleme hacmi, bant genişliği ve pin sayılarını izleyin.
- HTTP İstemcisi — Hiçbir SDK gerekmez. API ile etkileşim kurmak için standart
fetch()veya herhangi bir HTTP istemcisi kullanabilirsiniz.
Sorunlarla karşılaşırsanız, support.ipfs.ninja’da bir bilet açın veya Discord’da topluluğa katılın.
Ek güvenlik için IPFS yükleme tokenlarına göz atın.
NFT’ye özgü meta veri yapısı ve ERC-721 tokenURI kalıplarının eksiksiz bir açıklaması için NFT meta veri depolama kılavuzumuza bakın.

Yazar hakkında
Nacho Coll
Founder & Engineer at IPFS.NINJA
Nacho founded IPFS.NINJA to make content-addressed storage feel as simple as an S3 PUT — a single API call, a permanent CID, no wallets or peer discovery to reason about. Writes about IPFS internals, decentralized storage patterns, and the pinning-service landscape from the operator side of the wire.