IPFS Upload API — Kumpletong tutorial para sa mga developer
Matutunang mag-upload ng mga file sa IPFS sa pamamagitan ng REST API. Kumpletong code examples sa JavaScript, Node.js, at curl. Mag-upload ng JSON, mga larawan, gumamit ng signed tokens para sa client-side uploads.
Nacho founded IPFS.NINJA to make content-addressed storage feel as simple as an S3 PUT — a single API call, a permanent CID, no wallets or peer discovery to reason about.

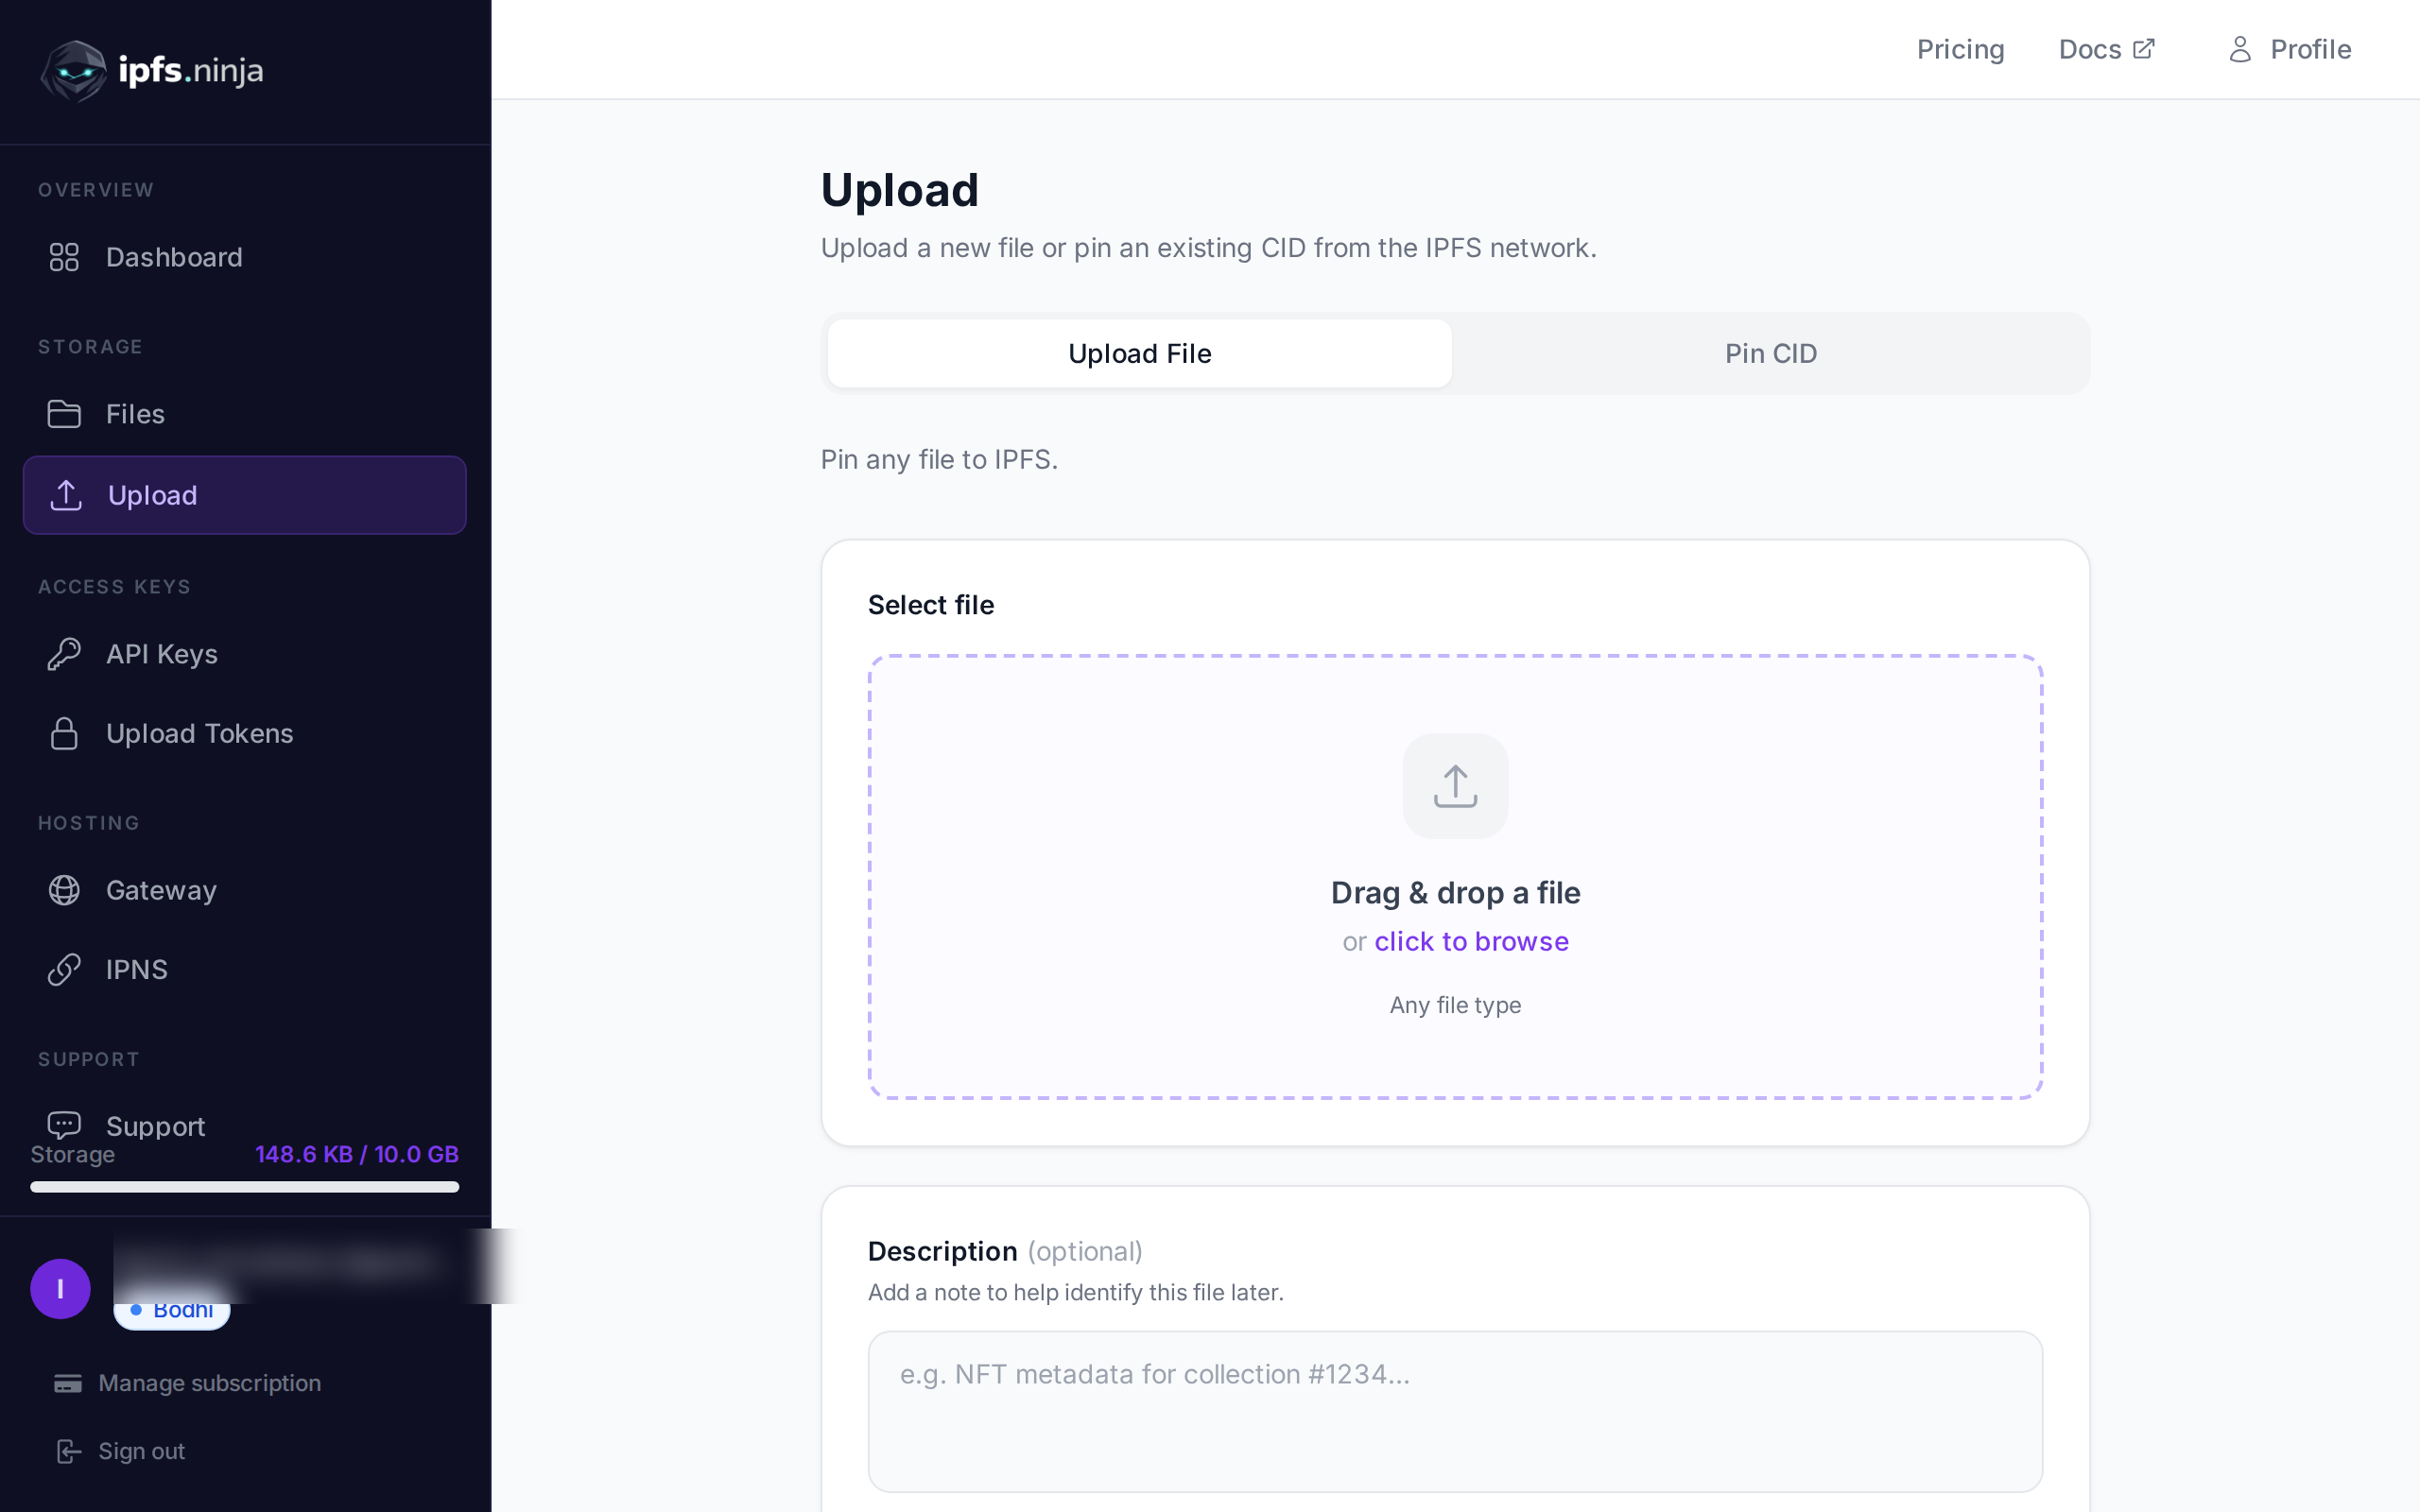
- Mag-upload ng JSON, mga larawan, at PDF sa IPFS gamit ang iisang POST request at isang API key.
- Gumawa ng signed, may takdang-oras na tokens para makapag-upload ang mga client-side app nang hindi inilalantad ang iyong API key.
- I-query ang kasaysayan ng iyong mga upload ayon sa date range at kunin ang metadata ng anumang naunang na-upload na file.
- Bawat upload ay tumatakbo laban sa iisang base URL — walang kailangang i-install na SDK para sa anumang wika.
Ang pag-upload ng mga file sa IPFS ay dapat na kasimple ng pagpapadala ng POST request. Sa tutorial na ito, gagawin mo nga iyan — magtu-upload ka ng JSON documents, mga larawan, at PDFs sa IPFS na walang iba kundi fetch() at isang API key. Sa huli, magkakaroon ka ng kumpletong Node.js script na nag-uupload ng content, naglilista ng mga file, kumukuha ng metadata, at gumagawa ng signed tokens para sa secure na client-side uploads. Bago sa IPFS? Magsimula sa Ano ang IPFS Pinning? para maunawaan ang mga fundamentals bago sumisid sa code.
Ano ang Iyong Bubuoin#
- Mag-upload ng JSON object sa IPFS at makakuha ng content identifier (CID) bilang resulta.
- Mag-upload ng binary image mula sa disk.
- Maglakip ng descriptions at custom metadata sa mga upload.
- Mag-query ng iyong upload history ayon sa date range.
- Kumuha ng mga detalye para sa specific na file.
- Gumawa ng time-limited signed tokens para makapag-upload nang direkta ang isang browser nang hindi inilalantad ang iyong API key.
- Mag-handle ng errors at mag-implement ng retry logic.
Lahat ay tumatakbo laban sa isang base URL: https://api.ipfs.ninja
1. Setup — Mag-sign up at Kumuha ng API Key#
- Mag-sign up para sa libreng account (walang credit card na kailangan).
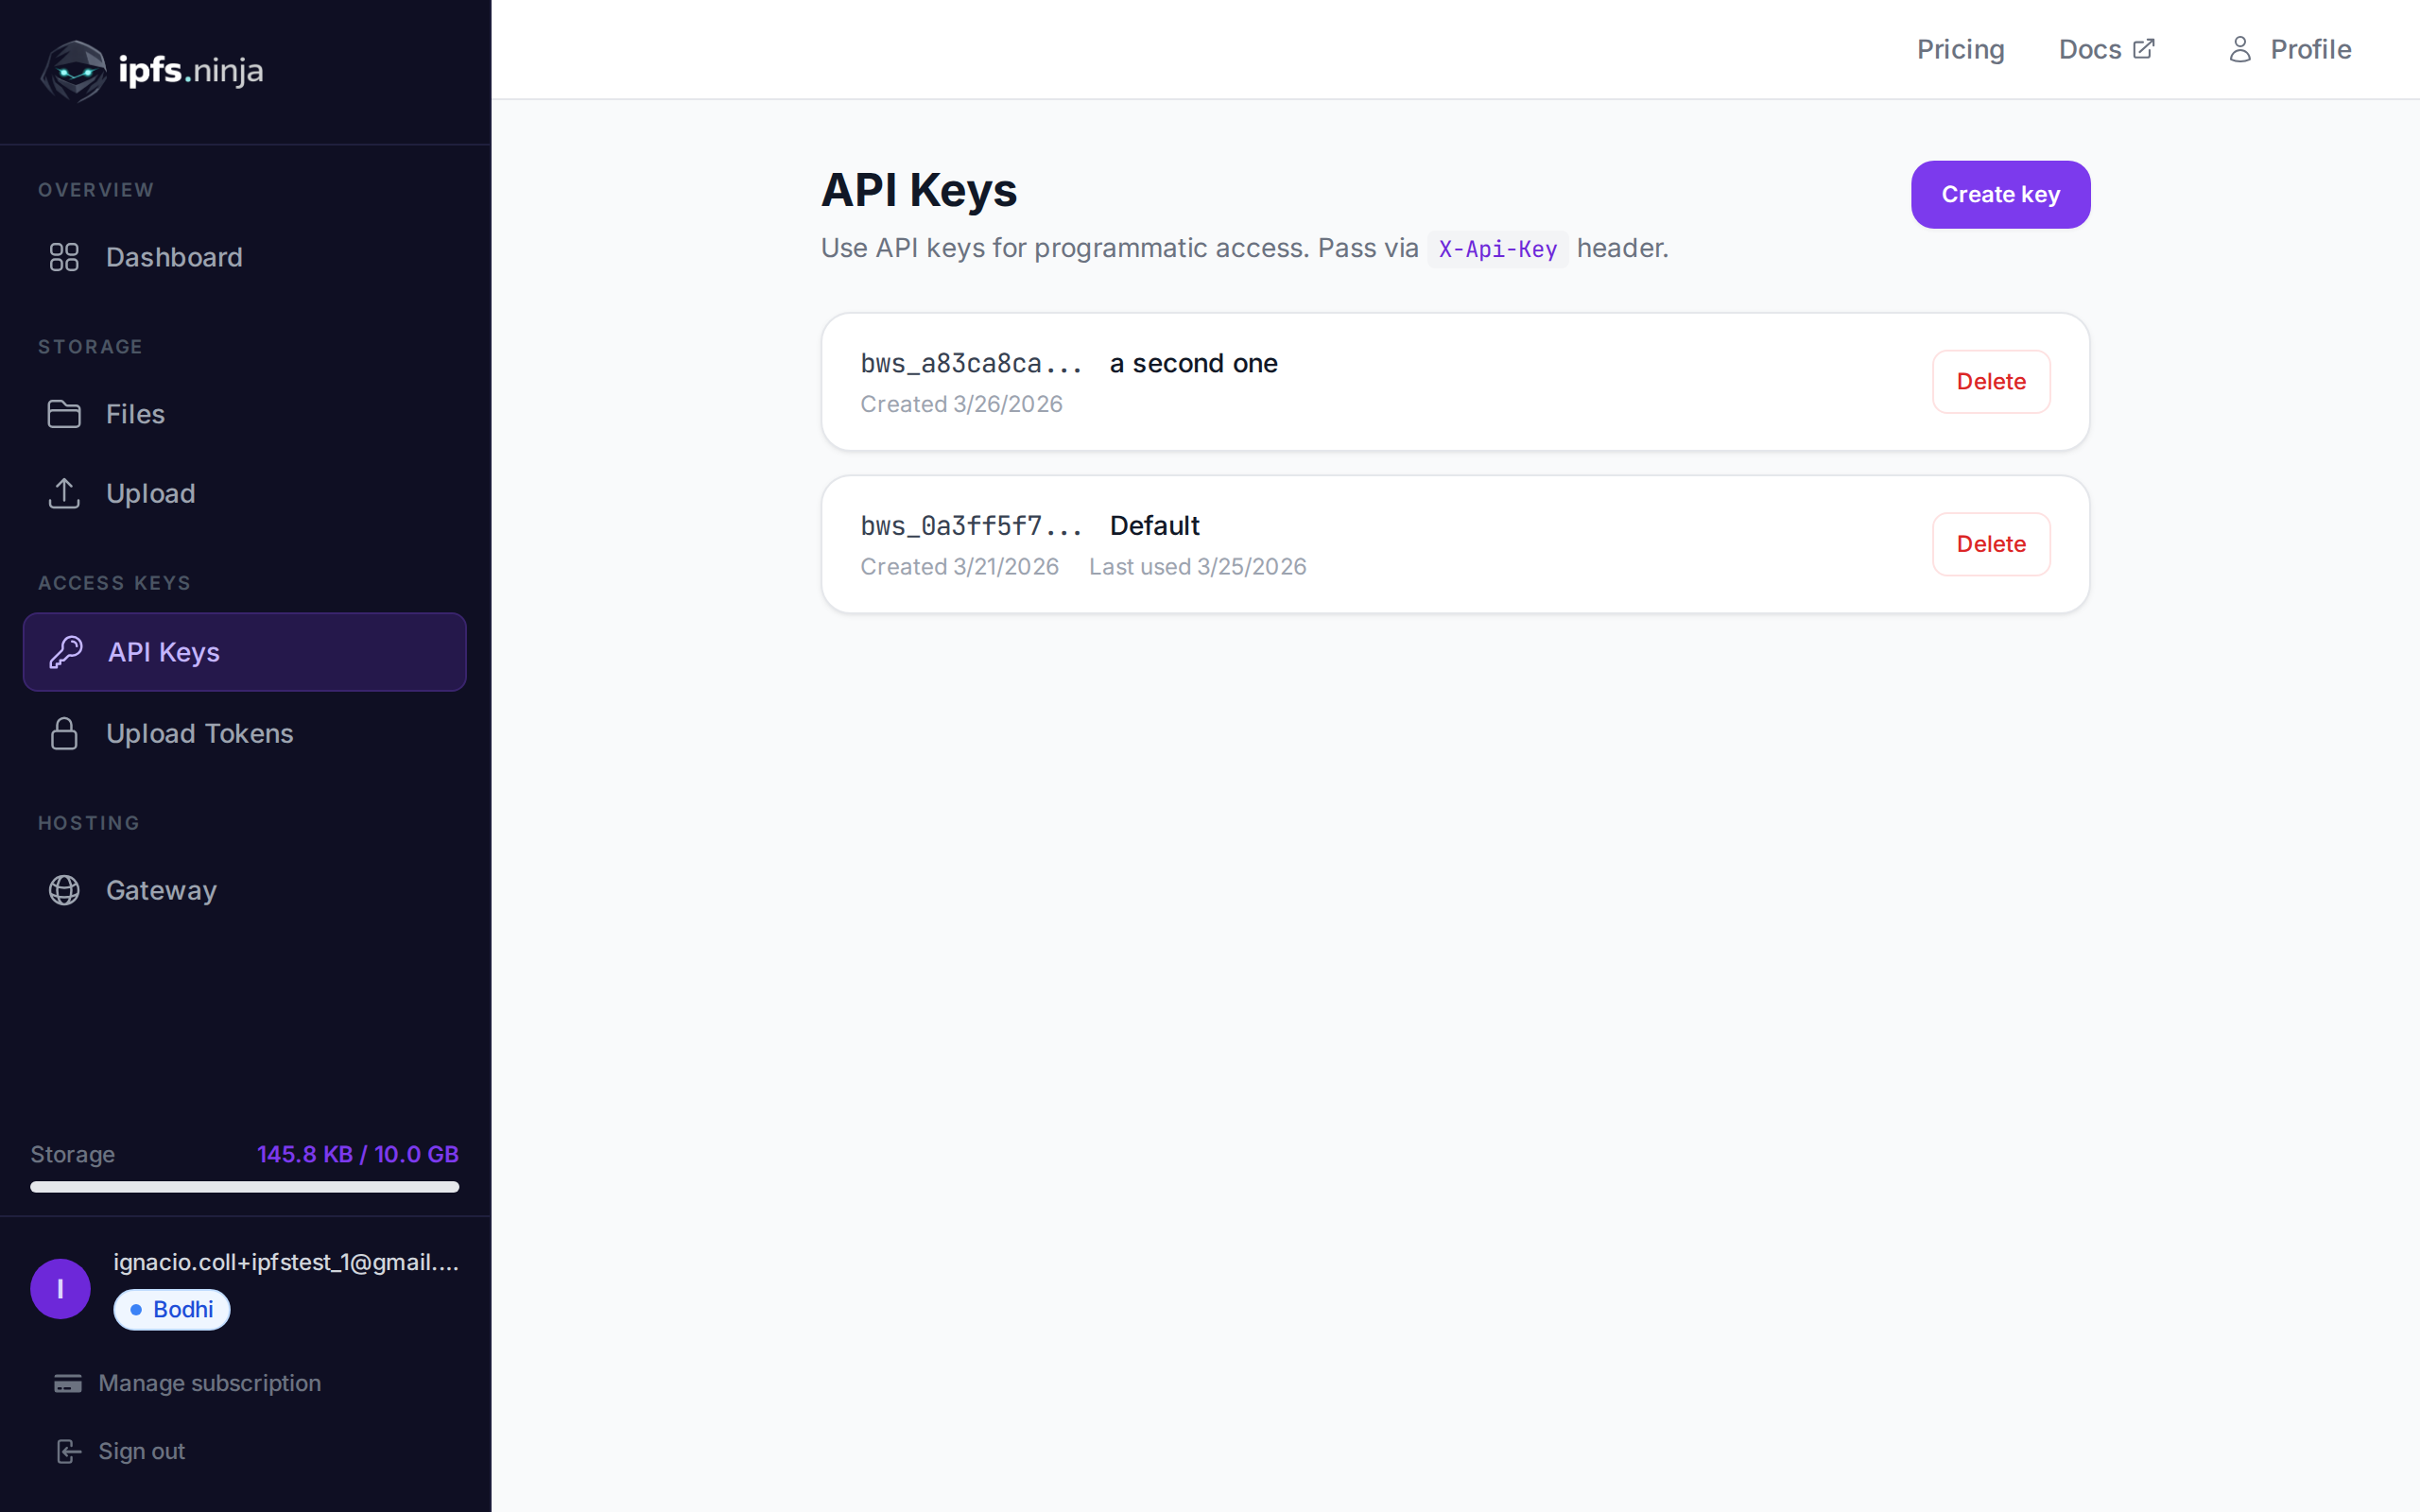
- Pumunta sa API Keys sa sidebar ng dashboard.
- I-click ang Create key, bigyan ito ng pangalan, at kopyahin ang key kaagad — hindi na ito ipapakita muli.
Ang iyong key ay parang bws_a1b2c3d4e5f6a7b8c9d0e1f2a3b4c5d6. Bawat halimbawa sa ibaba ay nagpapadala nito sa X-Api-Key header.
2. Mag-upload ng JSON sa IPFS#
Ang pinakasimpleng upload: ipasa ang isang plain JavaScript object bilang content at iseserialize ito ng API, ipi-pin sa IPFS, at ibabalik ang CID.
// upload-json.mjs
const API = "https://api.ipfs.ninja";
const API_KEY = "bws_your_key_here";

const payload = {
  content: {
    name: "Galactic Badge #42",
    description: "Proof of attendance — Galactic Meetup 2026",
    attributes: [
      { trait_type: "Event", value: "Galactic Meetup" },
      { trait_type: "Year", value: 2026 }
    ]
  }
};

const res = await fetch(`${API}/upload/new`, {
  method: "POST",
  headers: {
    "Content-Type": "application/json",
    "X-Api-Key": API_KEY
  },
  body: JSON.stringify(payload)
});

const data = await res.json();
console.log("CID :", data.cid);
console.log("Size:", data.sizeMB, "MB");
console.log("IPFS:", data.uris.ipfs);
console.log("URL :", data.uris.url);
Patakbuhin gamit ang node upload-json.mjs. Ang isang matagumpay na response ay ganito ang itsura:
{
  "cid": "bafkreigx7gq...",
  "sizeMB": 0.0004,
  "uris": {
    "ipfs": "ipfs://bafkreigx7gq...",
    "url": "https://ipfs.ninja/ipfs/bafkreigx7gq..."
  }
}
Ang url field ay tumuturo sa isang public HTTP gateway, kaya agad na maa-access ang content sa anumang browser.
3. Mag-upload ng Larawan#
Ang binary files (mga larawan, PDFs, audio) ay ipinapadala bilang base64-encoded strings sa content field.
// upload-image.mjs
import { readFileSync } from "node:fs";

const API = "https://api.ipfs.ninja";
const API_KEY = "bws_your_key_here";

const imageBuffer = readFileSync("./photo.png");
const base64 = imageBuffer.toString("base64");

const res = await fetch(`${API}/upload/new`, {
  method: "POST",
  headers: {
    "Content-Type": "application/json",
    "X-Api-Key": API_KEY
  },
  body: JSON.stringify({ content: base64 })
});

const data = await res.json();
console.log("Image CID:", data.cid);
console.log("Gateway  :", data.uris.url);
Ang API ay automatic na nakikilala ang MIME type — PNG, JPEG, WebP, GIF, at PDF ay lahat suportado. Walang extra headers o content-type overrides na kailangan.
Sa pamamagitan ng curl, ang parehong operasyon ay ganito ang itsura:
BASE64=$(base64 -w 0 photo.png)

curl -X POST https://api.ipfs.ninja/upload/new \
  -H "Content-Type: application/json" \
  -H "X-Api-Key: bws_your_key_here" \
  -d "{\"content\": \"$BASE64\"}"
4. Mag-upload nang may Metadata#
Bawat upload ay tumatanggap ng dalawang optional fields: description (free-text label) at metadata (arbitrary key-value pairs). Pareho silang naka-imbak kasama ng CID at ibinabalik kapag nag-list o kumukuha ka ng file sa hinaharap.
// upload-with-metadata.mjs
const API = "https://api.ipfs.ninja";
const API_KEY = "bws_your_key_here";

const res = await fetch(`${API}/upload/new`, {
  method: "POST",
  headers: {
    "Content-Type": "application/json",
    "X-Api-Key": API_KEY
  },
  body: JSON.stringify({
    content: { title: "Meeting Notes", body: "Q1 roadmap recap..." },
    description: "Q1 2026 planning meeting notes",
    metadata: {
      project: "acme-app",
      author: "dana",
      version: "1"
    }
  })
});

const data = await res.json();
console.log("CID:", data.cid);
Pinapadali ng metadata ang pag-filter at pag-organize ng mga file sa iyong panig nang hindi kinakailangang i-parse ang IPFS content mismo.
5. I-pin ang Isang Umiiral na CID#
Kung mayroon ka nang content sa IPFS at gusto mong tiyaking mananatili itong available, i-pin ito ayon sa CID:
// pin-cid.mjs
const API = "https://api.ipfs.ninja";
const API_KEY = "bws_your_key_here";

const res = await fetch(`${API}/pin`, {
  method: "POST",
  headers: {
    "Content-Type": "application/json",
    "X-Api-Key": API_KEY
  },
  body: JSON.stringify({
    cid: "bafkreigx7gq...",
    description: "Pinned from external source"
  })
});

const data = await res.json();
console.log("Pinned:", data.cid);
Kung sanay ka na sa S3-style na pag-upload at gusto mong makita kung paano ito ihahambing sa isang simpleng REST approach, basahin ang Alternatibo sa Filebase: Mas Simpleng IPFS Pinning Walang S3.
6. Ilista ang Iyong mga File#
Kunin ang bawat file na inu-upload mo sa loob ng isang time window. Ang from at to query parameters ay Unix timestamps sa milliseconds.
// list-files.mjs
const API = "https://api.ipfs.ninja";
const API_KEY = "bws_your_key_here";

const now = Date.now();
const oneWeekAgo = now - 7 * 24 * 60 * 60 * 1000;

const url = `${API}/upload/list?from=${oneWeekAgo}&to=${now}`;

const res = await fetch(url, {
  headers: { "X-Api-Key": API_KEY }
});

const files = await res.json();

for (const file of files) {
  console.log(`${file.cid}  ${file.description ?? "(no description)"}`);
}
Sa curl:
FROM=$(($(date +%s) * 1000 - 604800000))
TO=$(($(date +%s) * 1000))

curl -s "https://api.ipfs.ninja/upload/list?from=$FROM&to=$TO" \
  -H "X-Api-Key: bws_your_key_here" | jq .
7. Kumuha ng Mga Detalye ng File#
Kunin ang kumpletong record para sa isang CID, kasama ang metadata, laki, at mga timestamp:
// get-file.mjs
const API = "https://api.ipfs.ninja";
const API_KEY = "bws_your_key_here";
const CID = "bafkreigx7gq...";

const res = await fetch(`${API}/file/${CID}`, {
  headers: { "X-Api-Key": API_KEY }
});

const details = await res.json();
console.log(JSON.stringify(details, null, 2));
8. Client-Side Uploads gamit ang Signed Tokens#
Ang pag-embed ng API key sa isang browser bundle ay isang security risk. Sa halip, mag-generate ng isang short-lived signed token sa iyong server at ipasa ito sa client.
Server (Express)#
// server.mjs
import express from "express";

const app = express();
const API = "https://api.ipfs.ninja";
const API_KEY = process.env.IPFS_API_KEY;

app.post("/api/upload-token", async (req, res) => {
  const response = await fetch(`${API}/upload/signed-url`, {
    method: "POST",
    headers: {
      "Content-Type": "application/json",
      "X-Api-Key": API_KEY
    },
    body: JSON.stringify({
      name: "browser-upload",
      expiresIn: 600          // token valid for 10 minutes
    })
  });

  const { token, tokenId, expiresAt } = await response.json();
  res.json({ token, tokenId, expiresAt });
});

app.listen(3000, () => console.log("Server running on :3000"));
Browser Client#
<!-- upload.html -->
<input type="file" id="filePicker" />
<button id="uploadBtn">Upload to IPFS</button>
<pre id="result"></pre>

<script>
  const API = "https://api.ipfs.ninja";

  document.getElementById("uploadBtn").addEventListener("click", async () => {
    // 1. Get a signed token from your own backend
    const tokenRes = await fetch("/api/upload-token", { method: "POST" });
    const { token } = await tokenRes.json();

    // 2. Read the selected file as base64
    const file = document.getElementById("filePicker").files[0];
    if (!file) return alert("Pick a file first");

    const base64 = await new Promise((resolve) => {
      const reader = new FileReader();
      reader.onload = () => resolve(reader.result.split(",")[1]);
      reader.readAsDataURL(file);
    });

    // 3. Upload directly to IPFS using the signed token
    const uploadRes = await fetch(`${API}/upload/new`, {
      method: "POST",
      headers: {
        "Content-Type": "application/json",
        "Authorization": `Signed ${token}`
      },
      body: JSON.stringify({
        content: base64,
        description: file.name
      })
    });

    const data = await uploadRes.json();
    document.getElementById("result").textContent = JSON.stringify(data, null, 2);
  });
</script>
Hindi kailanman makikita ng browser ang iyong API key. Ang signed token ay automatic na mag-eexpire. Ang mga token ay multi-use — maaaring gamitin nang maraming beses hanggang sa mag-expire o ma-revoke. Ang useCount ay tina-track ngunit hindi ina-enforce bilang isang limit.
9. Error Handling#
Ang API ay gumagamit ng conventional HTTP status codes. Narito ang mga dapat mong i-handle nang malinaw:
| Status | Kahulugan | Ano ang Gagawin |
|---|---|---|
| 400 | Bad request — nawawalang o invalid na fields | Tiyakin na ang content ay naroon at valid |
| 401 | Unauthorized — mali o nawawalang API key | I-verify ang X-Api-Key header |
| 413 | Payload too large | Bawasan ang laki ng file o hatiin ang content |
| 429 | Rate limited | Mag-back off at subukan muli nang may exponential delay |
| 500 | Server error | Subukang muli pagkatapos ng maikling delay |
Isang resilient upload function na may exponential backoff:
// resilient-upload.mjs
const API = "https://api.ipfs.ninja";
const API_KEY = "bws_your_key_here";

async function uploadWithRetry(content, retries = 3) {
  for (let attempt = 1; attempt <= retries; attempt++) {
    const res = await fetch(`${API}/upload/new`, {
      method: "POST",
      headers: {
        "Content-Type": "application/json",
        "X-Api-Key": API_KEY
      },
      body: JSON.stringify({ content })
    });

    if (res.ok) return await res.json();

    const body = await res.text();

    if (res.status === 401) {
      throw new Error(`Authentication failed: ${body}`);
    }

    if (res.status === 413) {
      throw new Error(`Payload too large — reduce file size. ${body}`);
    }

    if (res.status === 429 || res.status >= 500) {
      const delay = Math.pow(2, attempt) * 1000;    // 2s, 4s, 8s
      console.warn(`Attempt ${attempt} failed (${res.status}). Retrying in ${delay}ms...`);
      await new Promise((r) => setTimeout(r, delay));
      continue;
    }

    throw new Error(`Upload failed (${res.status}): ${body}`);
  }

  throw new Error("Upload failed after all retries");
}

// Usage
const data = await uploadWithRetry({ hello: "world" });
console.log("CID:", data.cid);
10. Kumpletong Halimbawa ng Pagtatrabaho#
Isang script na sumusubok sa bawat endpoint na sakop sa tutorial na ito. I-save ito bilang ipfs-demo.mjs at patakbuhin gamit ang node ipfs-demo.mjs.
// ipfs-demo.mjs
import { readFileSync } from "node:fs";

const API = "https://api.ipfs.ninja";
const API_KEY = "bws_your_key_here";

const headers = {
  "Content-Type": "application/json",
  "X-Api-Key": API_KEY
};

async function request(method, path, body) {
  const opts = { method, headers };
  if (body) opts.body = JSON.stringify(body);
  const res = await fetch(`${API}${path}`, opts);
  if (!res.ok) throw new Error(`${method} ${path} → ${res.status}: ${await res.text()}`);
  return res.json();
}

// --- 1. Upload JSON ---
console.log("--- Upload JSON ---");
const jsonResult = await request("POST", "/upload/new", {
  content: { name: "Demo Token", edition: 1 },
  description: "Tutorial demo — JSON upload",
  metadata: { tutorial: "true" }
});
console.log("CID:", jsonResult.cid);
console.log("URL:", jsonResult.uris.url);

// --- 2. Upload an image (if photo.png exists) ---
try {
  const img = readFileSync("./photo.png");
  console.log("\n--- Upload Image ---");
  const imgResult = await request("POST", "/upload/new", {
    content: img.toString("base64"),
    description: "Tutorial demo — image upload"
  });
  console.log("CID:", imgResult.cid);
  console.log("URL:", imgResult.uris.url);
} catch {
  console.log("\n--- Skipping image upload (no photo.png found) ---");
}

// --- 3. Pin the JSON CID ---
console.log("\n--- Pin CID ---");
const pinResult = await request("POST", "/pin", {
  cid: jsonResult.cid,
  description: "Pinned from tutorial"
});
console.log("Pinned:", pinResult.cid);

// --- 4. Get file details ---
console.log("\n--- File Details ---");
const details = await request("GET", `/file/${jsonResult.cid}`);
console.log(JSON.stringify(details, null, 2));

// --- 5. List recent files ---
console.log("\n--- Recent Files ---");
const now = Date.now();
const oneHourAgo = now - 60 * 60 * 1000;
const files = await request("GET", `/upload/list?from=${oneHourAgo}&to=${now}`);
console.log(`Found ${files.length} file(s) in the last hour`);
for (const f of files) {
  console.log(` - ${f.cid}  ${f.description ?? ""}`);
}

// --- 6. Create a signed upload token ---
console.log("\n--- Signed Token ---");
const tokenResult = await request("POST", "/upload/signed-url", {
  name: "demo-token",
  expiresIn: 300
});
console.log("Token ID :", tokenResult.tokenId);
console.log("Expires  :", new Date(tokenResult.expiresAt).toISOString());

// --- 7. Upload using the signed token ---
console.log("\n--- Upload with Signed Token ---");
const signedRes = await fetch(`${API}/upload/new`, {
  method: "POST",
  headers: {
    "Content-Type": "application/json",
    "Authorization": `Signed ${tokenResult.token}`
  },
  body: JSON.stringify({
    content: { note: "Uploaded with a signed token" }
  })
});
const signedData = await signedRes.json();
console.log("CID:", signedData.cid);

console.log("\nDone.");
Palitan ang bws_your_key_here ng tunay na key at patakbuhin ang script. Bawat hakbang ay nagpi-print ng resulta nito para makasunod ka.
11. Susunod na Hakbang#
Alam mo na ngayon kung paano mag-upload, mag-pin, mag-list, at kumuha ng mga file sa pamamagitan ng IPFS Upload API at kung paano panatilihing ligtas ang browser uploads gamit ang signed tokens. Para sa mas malawak na pangkalahatang-ideya kabilang ang dashboard UI at mga Python example, tingnan ang Paano Mag-upload ng mga File sa IPFS. Narito kung saan tutuloy mula rito:
- API Reference — Kumpletong endpoint documentation sa ipfs.ninja/docs.
- Custom Gateways — Mag-serve ng IPFS content mula sa iyong sariling domain. Tingnan ang gateway setup guide.
- Analytics — I-track ang upload volume, bandwidth, at pin counts sa dashboard.
- HTTP Client — Walang SDK na kailangan. Maaari kang gumamit ng standard na
fetch()o anumang HTTP client para makipag-interact sa API.
Kung nakakaranas ka ng mga isyu, magbukas ng ticket sa support.ipfs.ninja o sumama sa community sa Discord.
Para sa karagdagang seguridad, tingnan ang mga IPFS upload token.
Para sa kumpletong walkthrough ng NFT-specific na istraktura ng metadata at mga pattern ng ERC-721 tokenURI, tingnan ang aming gabay sa pag-iimbak ng NFT metadata.

Tungkol sa may-akda
Nacho Coll
Founder & Engineer at IPFS.NINJA
Nacho founded IPFS.NINJA to make content-addressed storage feel as simple as an S3 PUT — a single API call, a permanent CID, no wallets or peer discovery to reason about. Writes about IPFS internals, decentralized storage patterns, and the pinning-service landscape from the operator side of the wire.